Saturday, January 12, 2008

Fuji Natura Classica: The "color" trials

A couple weeks ago I did a somewhat in-depth review of the Fuji Natura Classica, and had run a roll of Fuji 1600 black-and-white film through the thing. As promised, last week I went through a roll of Fuji Natura 1600, film that was designed specifically to be used in this camera. Or maybe the camera was specifically designed to use the film. Either way, I'm not going to talk about the camera this time. I'm just going to post the results and some of my thoughts (few as they may be).
I took this camera with on the same road trip as the Techni-Pak 1. So it's more of the same slightly ugly, yet very interesting ghost/mining town stuff. First off, I have to say I think this is probably my first roll of color 35mm in at least 10 years. Maybe even a bit longer. So, while I don't hate it or anything, it just hasn't been my thing. So it was a bit interesting to me to see what I would come up with. I just have a hard time seeing beyond the "they look like snapshots of cool things" vibe. I tried my best, though. I scanned from the negatives, not the prints that came with them.
We start with full daylight. This is 1600 speed film that is supposed to look 'natural' in daylight and low light without a flash. This shot is probably around noon with full sun.
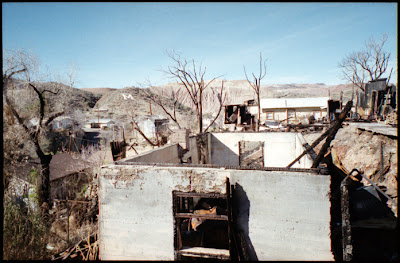

Nice, sharp image. As with the black and white film, it seems to be on the edge of overexposure. But maybe that's just because I'm used to Kodak 400 and cheaper 35mm cameras. These next two shots were taken in a very dark abandoned building. If I had used one of my toy cameras, I might have gotten a couple strips of light, but no image. This is what the camera is designed to do, without a flash, and it works quite well.
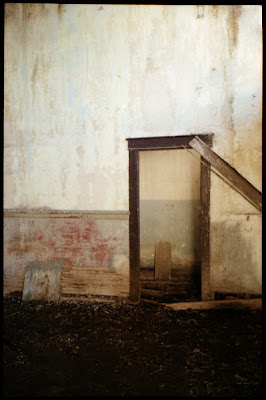
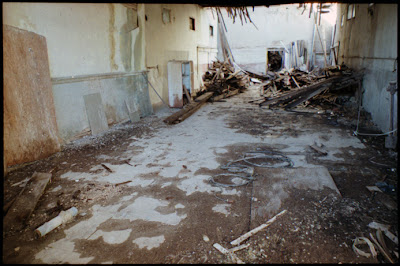

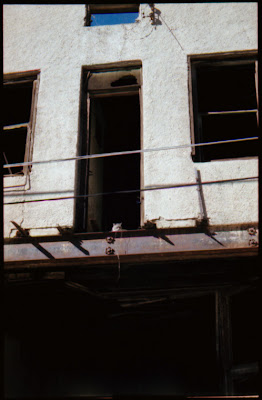
I know the shots aren't that impressive, but it really is amazing that these are just 'point at and shoot' photos in a very dark room, with no flash. I mean, seriously, the camera adjusts better to the shade than my eyes do. The detail is incredible, and the colors are as accurate as I imagine they would be, considering that I couldn't see the colors all that well. This is the outside of that same building. The dark area below is where the two above photos were shot. You can see that the camera does what it is supposed to do - adjust exposure depending on the light source. I think I'm repeating myself.

Moving on, another shot inside of a dark kitchen of an abandoned house.
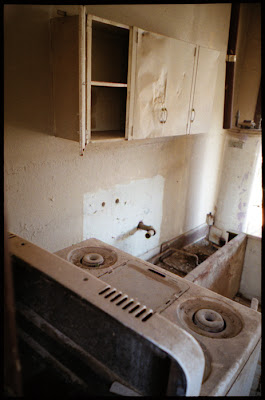

Again, nice job working in low light. Colors seem to be fairly accurate. If that kitchen could be considered to have 'color'. The same building shot from the outside shows the camera to falter a bit in its abilities.
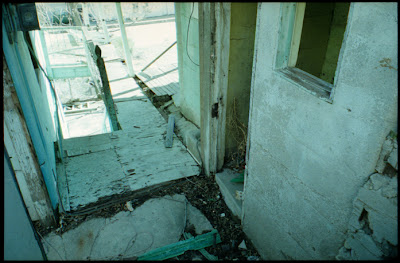

The camera exposed for the shaded area in the foreground, leaving the sunny area blown out. This is pretty common for auto-exposure cameras. Still, the camera handles it fairly well...certainly better than my digital, which often leaves areas completely black or fully blown out depending on what it exposes for.
Later, as the sun began to set, I took a few low light dusk shots. If it can shoot a dark room, it shouldn't have a problem shooting in low light outside. For comparison, a shot with my Polaroid 195 and very expired 665 (1985 to be exact...I think I got four shots out of the pack that weren't dried up).
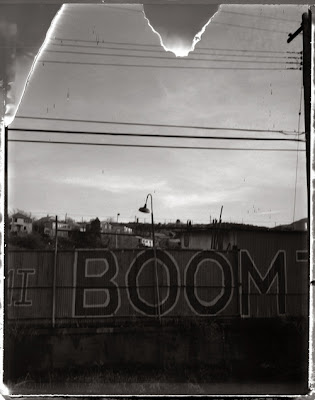
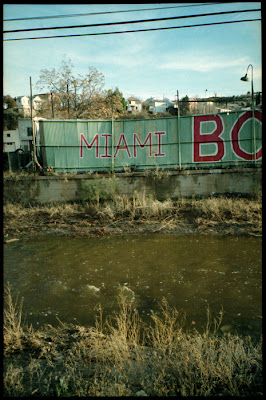

One thing about it...it's actually kind of difficult to tell what time your shots were taken, because it still looks like full daylight. I think this was about an hour before dark, and the sun was starting to hide behind the mountains. You also get a good idea of how much wider the Fuji camera shoots. I wasn't aiming at the exact same spot, but I was standing in the same place for both shots.
About a half an hour later, it's pretty dusky. For comparison, the same wall shot with the Fuji and with a Stellar (Diana clone).
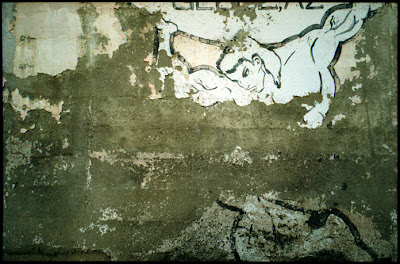
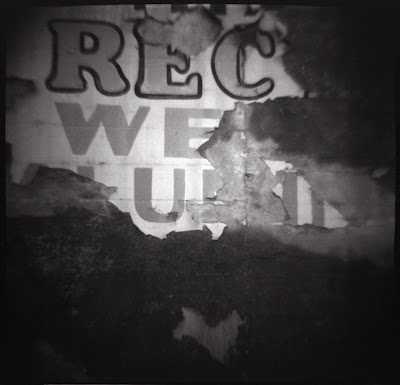

The Stellar actually did fairly well, but the Classica didn't even break a sweat. I also took a couple shots of the kitties inside again, but they weren't even worth scanning. The shots without the flash were blurry and grainy...which looks much better in black and white than in color. In color, it just looks muddy and ugly. The flash shot looked like a color shot taken with a flash (central bright, background black).
So that's it for the Fuji Natura Classica review! Again, great little camera. The shutter does slow down in very low light, so things will blur, but I didn't get any blur from camera shake with static objects. I prefer black and white over color, but it works well with both. An all-around nifty little point and shoot camera.
Still planning on a big Polaroid 150/Type 47 post here in the next few weeks. School has started, so life is a bit of a drag once again. Adios!

Wednesday, January 09, 2008

Black and White by Technicolor

A few weeks ago I picked up a camera that was listed as a disposable 126 camera, for a measly $2 - the Technicolor Techni-pak 1. The box was reason enough to buy the camera:


Looked to be from the 1970s, possible early 1980s, maybe filled with popcorn or circus peanuts. It's one of those deals where you buy the camera, take your shots and then mail it back to them. They send you your prints and a reloaded camera, repeat forever until the company no longer exists or doesn't care anymore.
On the back of the camera, it said "X-1 emulsion". No idea what this means. I asked around and did a little research on the Web, and kind of figured that, being a camera made by Technicolor, it was probably loaded with old Technicolor movie film. And after reading a bit more, figured that the movie film was most likely Kodachrome. There was approximately one place on the entire planet that still developed Kodachrome, in Kansas, and I don't think they do it anymore. (*edit* They do still develop Kodachrome.) I wasn't to keen on spending $30 to develop a roll of film, anyway. So what do I do? Rip it open, of course!
This is the camera out of the box.


A very basic fixed focus point and shoot. It does have two settings for Bright and Cloudy. And a film counter on top. That's about it! Cool looking little beast, too. Vintage modern. Okay, since I wasn't worried about killing the color film inside, I tore off the sticker on the back that had some directions and mailing addresses on it (for some reason, I didn't think to take a picture of the camera before I did this). The back was simple to open. Just used a screwdriver to pop the sides.


Easy as pie. And...what's this? 126? Do I see 126? NO! Hooray. It's actually a 35mm camera! Makes this camera much easier to use. I'm still working on making a reloadable 126 cartridge using 35mm film. The film is the same size, but the sprocket holes are different. This, I can deal with.


Interesting, too, that there is no film canister. Just a plastic ring to hold the film and a take-up spool to which it is taped. I cut the tape off of the spool and yanked it out.


Surpise number two...35mm camera. I see a square.


Sweet! A square 35mm camera! I guess I could have figured this out by the box that said 3 1/2 x 3 1/2-inch prints. Wasn't expecting it, though, and was feeling a bit stoked. Little tiny square shots on 35mm film? Gotta be crappy. Cool.
Okay, time to replace the film. I wanted to shoot black and white, of course. Used a roll of cheap Arista.edu 100, 24 exposures. I knew I'd be doing part of this in the dark because of the lack of film canister, so I did as much as possible with light.


Simple enough. Tape the end and tape it to the spool. This part was a little dumb in retrospect, as I discovered that you can remove the spool by pulling up on the winder. But I didn't figure this out until I finished my roll. So the next part I did in the dark. I pulled the film out of the canister, cut it, and then wound it tightly and stuck it in the little plastic ring that came with the original film. Snapped the cover back on and there it is, ready to use!


Before I jump into that, though, I had better read the instructions. Very important, you know, as the camera is a bit complicated.


Well, turns out it is a bit more complicated than I expected. There is a funny white button on the back. What you do is wind the film, which locks in it place. Then you take your shot. Then you press the white button to wind to the next shot. You can take as many shots as you want on a single frame, but you can't advance the film to the next shot until you press the white button. Okay, not so complicated. just odd.
I was also trying to figure out how to reset the counter. Doesn't seem possible, but it does just keep going around after it hits the 20 mark. I could probably wind forward and take shots without film to get it back to zero. Or I could just guess how many shots I have. I managed to get 19 shots, with probably six shots left that i missed out on. The counter doesn't seem particularly accurate. Anyway, headed towards Globe with sol exposure, ended up spending most of the day in Miami (Arizona), an interesting little ghost/mining town. Lots of neat abandoned building and houses falling down mountainsides. I took the Techni-pak 1 with me, as well as 5 other cameras. I kind of didn't try too hard with the Techni-pak 1, since I had no idea how it would shoot. Turns out, it's an excellent little piece of plastic, with trademark toy camera qualities. Enough talk, more pictures!


Nifty! Has great falloff and vignette along the edges. Grainy, of course, considering the size of the negs. My first true 35mm toy camera. Some people consider Akiras and other cheap 35mm cameras to be toy cameras, and maybe they are, but they don't have those toy camera qualities that I enjoy. This camera does! I will most definitely be taking this out for more use. It's so small, it fits in my pocket. Sweet results. Easy to use. Yep, another catch...for only $2! Unused!
One thing to note about it, the aperture setting actually seems to make a difference. The Bright setting is about half the diameter of the Cloudy setting. Some of the shots I took in full daylight on Cloudy were very blown out. Little detail and little contrast. And, typical of a toy camera, the shots I took later in the day after the sun was behind the mountains were very underexposed, regardless of aperture. Still, I give it a thumbs up. For the two other people in the world that might have one or be able to find one (and only one person will use it...the other will leave it on a shelf).
I'm working on a few other posts here in the near future. One will be on Polaroid Type 47, which will be fairly involved, covering my learning curve and the camera used, etc. I also ran a color roll through my Fuji Nature Classica. I prefer black and white film in the camera, but that's just what I like. More on that later. I guess I still need to talk about my stereo/panoramic pinhole at some point. School starts next week, so I'm not sure how busy I'll be. Still need to find time to shoot! Seeya.

Friday, January 04, 2008

Photoshop versus Reality

I'm mostly an analogue photographer...but I don't have a darkroom. I develop my own film and, after that, I have to scan the negatives on my computer. For the most part, I just clean up the dust and stray hairs and maybe tone the image, or adjust the contrast when needed. My scanner is a Canoscan 8400F. I think I paid maybe $150 for it new. Now, I'm not sure if it's the scanner, or the software, or most likely a combination of the two, but it just doesn't scan very well sometimes. Other times, though, it's a photo saver.
Okay, so there are really two sides to the coin. On the one side, the scanner and photoshop isn't very good at scanning. It quite often leaves scanlines, or artifacting across the entire print. It doesn't always pick out the detail, often posterizing along the edges of things, or in gradations. I have a great shot that I can see on the neg. It was a dark room looking towards a window. I can see all the detail in the room, I can see the counter, I can see the jar on the counter. I can even see all of this stuff in the image preview for the scanner. When I scan it, I get black, and a white square for the window, and the lid of the jar. Granted, it's a very thin negative. It was very dark in the room. But I can see everything with my own eyes. The software absolutely refuses to acknowledge any detail in the neg. I have tried 20 different variations in settings, even brightening the entire image. I still get the exact same thing, a white window and a jar lid. I have a feeling I could probably bring this print out with an enlarger and the proper paper/developer.
The other side of the coin. There are shots that would probably print like complete crap if I used an enlarger. Usually it's dark, but not dark enough that the scanner can't pick everything out. Low light shots with toy cameras tend to be very low in contrast, and very grainy. If I can get the software to scan an image, I can almost always pull something out in Photoshop. This is particularly useful with expired film, as the images are often very faint, or very noisy. And it's obviously useful when scanning Polaroid goops, as it generally follows the same steps as pulling an image from a thin, bad negative.
What brought all this about? Well, I was just going through old negatives looking for shots I might have skipped over for whatever reason. I was in Jerome last year and took quite a few Diana shots. It was very cloudy and cold and just kind of dark. Not very toy camera friendly weather. Didn't stop me from shooting. One of the shots I was looking at today was this one. This is how Photoshop scanned the image.


Low light, low contrast, grainy. Also what tends to happen is that when the scanner software has to try harder to grab an image from the film, it picks out 10 times as much garbage at the same time. Gobs of dust and hair magically appear. So I fiddled with it in Photoshop, cleaned it up, and this is the end result.


Still maybe not the most exciting shot. I haven't decided how much I like it, but it certainly looks better than the original scan. Here are some other examples of shots I've manipulated in Photoshop.

Before


After


Before


After


Before


After


Before


After


Now, these changes aren't extreme. I'm not adding or subtracting objects from the photographs. I'm not altering anything, really, except maybe the look and the mood of the photograph. You might almost say they don't really look all that different after than they did before.
I'm kind of on the line when combining past technology and present technology. I certainly don't deny the usefulness of such tools as Photoshop. But I hesitate to rely on them. I like some of the purity of analogue photography. Technology is almost too easy (though, really, it does take some skill and experience to make a program like Photoshop work for you). I'm not an elitist, either, turning my nose up at the digital generation (as I'm really part of it). I just feel like I'm cheating myself if I don't rely on other skills to produce my photographs. That being said, I'm obviously relying on digital technology quite a bit for the presentation of my photographs. All this goes through my head as I see film slowly dying. Sure, there will always be film photography at some level, but when you can't even buy a film camera at an electronics store, or even have trouble finding disposable film cameras in some areas, you realize it is a dying art form.
And at the top of my list of dying photographic methods...Polaroid! Man, I will be so bummed when Polaroid film is gone for good. And it will happen one day. They halt production on one Polaroid film after another. Fuji fortunately makes instant film, and they seem to be very dedicated to continuing in the film market...but it is still going by the wayside.
And, I am so excited, because I just obtained some rolls of Type 47, which is 3000 speed Polaroid rollfilm! Expired in 1980, but it may still work if it's not bone dry. Can't wait to try. Of course, I had to buy a rollfilm camera. I picked up a Polaroid 150 for 12 bucks. Huge camera, weighs a ton. I'll report back when I get the film and try it out. I love photography schtuff.